Hi, this recipe is from the 'Patisserie Makes Perfect' online Blog and it was super fun to make.
Initially coming into this recipe, I was a bit concerned about whether or not I could actually make this as I don't own a stand mixer. After a quick look at the comments on the original recipe blog post, it became apparent that at least one other person had tried without a mixer and yielded decent enough results. That was all the confirmation I needed to give this a go.
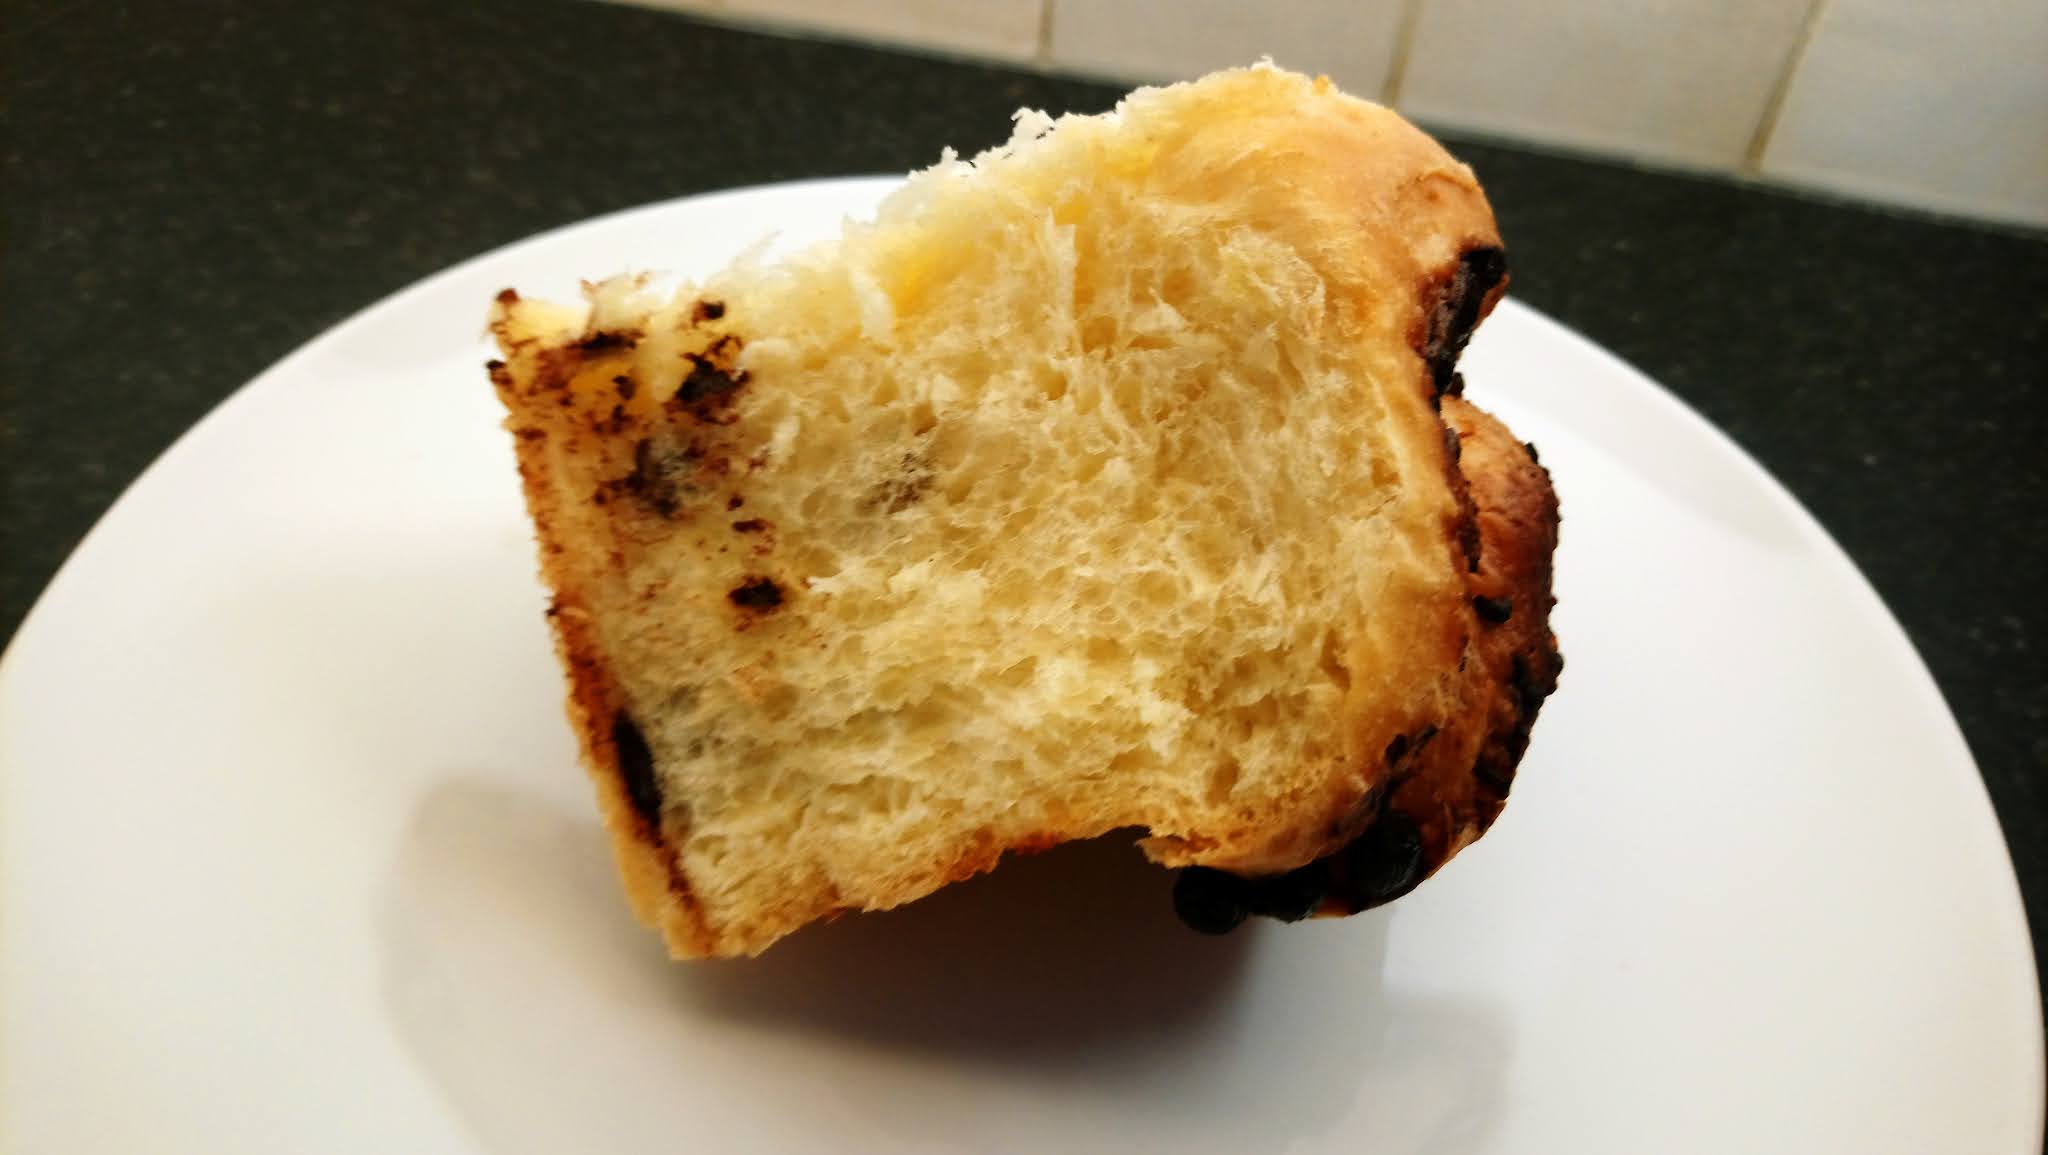
The inside of the bread, once cooked, is similar to a croissant or panettone, (and of course brioche). In mine, the chocolate chip distribution was a bit uneven, oops, but at least it is easily fixable for next time. While making, your dough will become super sticky and you may be tempted to add more flour to try to combat this, I almost did so myself. However, according to google, this will make the dough tight and not airy, so regardless of if your dough is sticky like mine or smooth as the original recipe appears to be suggesting; do not add extra flour! Just lump dough in, wherever you prove dough, and cross your fingers. It will be fine. I suggest making this when you have a lot of time, as you need to be around to proof and knead and proof and knead and proof again afterwards. So, don't make this on a busy weekend.
This can be made with whatever chocolate you like, I used dark, or even left out entirely. After cooking, you may get some wet patches in the bread, this is likely to be the creme patissiere, if the dough is cooked elsewhere, so do not fret.
Enjoy!
***
 |
| Finished Brioche |
***
 |
| Finished Brioche in tin. |
***
Dietary Info:
-Contains Dairy
{If it's only milk you can't have, use a plant based alternative. And in place of the butter, use a vegan block butter, flora do a nice one. If it is also eggs, I suggest using one of the Vegan recipes below.}
-Unsuitable for Vegans
{Personally, I think there are too many things to substitute in this brioche to make this specific recipe for Vegans. Instead, I would suggest looking for a vegan brioche recipe online e.g. here, here and here. Good Luck!}
-Suitable for Vegetarians
-No Nuts
-Contains Gluten
{In place of the strong white bread flour, use an alternative white bread flour. I would advise against using a G-F brown bread flour though. For example, Dove does a G-F white bread flour, that I believe would be suitable.}
-Delicious Breakfast, Snack or Pudding
***
 |
| Inside Brioche |
***
 |
| Sliced Brioche |
***
Makes: 9 swirls {+ offcuts}
Prep: 1 day and 2hrs {Making creme patissiere and proofing.}
Cook: 35mins {Mine took 30mins exactly.}
23cm Round Cake Tin needed
***
 |
| Brioche after final proofing |
***
Ingredients:
Brioche Dough:
-500g Strong White Bread Flour
-6g Fine Salt
-7g Fast Action Dried Yeast
-30g Caster Sugar
-7 Eggs plus 1 for egg wash
-250g Unsalted Butter Softened
-100g Dark Chocolate Chips
Creme Patissiere:
-250ml Whole Milk
-1tsp Unsalted Butter
-2 egg yolks
-50g Granulated Sugar
-20g Corn flour
-1tbsp Plain Flour
-1/2tsp Vanilla Bean Extract {I just used vanilla extract, as in the bottle was not explicitly labelled vanilla 'bean' extract.}
Method:
1: Place the flour, salt, yeast and sugar in the bowl of a food mixer with the dough hook fitted. {Sieve the flour!! To make without a mixer, like moi, just place these in a normal large mixing bowl.}
2: Crack the eggs into a jug {or any container} and mix with a fork, then pour this into the flour mixture and beat on a slow speed for 6-8 minutes until the dough starts to come away from the sides of the bowl. {Make a hole in the centre of the flour mixture and pour in the eggs. Using a wooden spoon, incorporate the eggs and flour together. The mixture will be either a bit dry or very sticky, don't worry about its texture yet. If needed, use hands as well. My dough was very much stuck to the sides of the bowl, so don't worry too much about that step either. The main thing is that everything is mixed together fully.}
3: Take the butter and cut it into cubes and slowly add it to the mixer beating on medium speed until all of the butter has been incorporated. Make sure the butter has been mixed in before adding the next lot. {Using your hands, squash and knead the cubes of butter into your dough. This is when it gets a bit messy! Make sure everything is mixed in before adding more butter.}
4: Mix on medium-high for 5 minutes until the dough is elastic and pulled away from the sides. {Continue to knead until everything is combined. Mine was the texture of glue, it was super sticky and not like 'normal' dough. I wouldn't have been able to knead it had I taken it out of the bowl. So, don't worry if yours isn't how you expected. This is how it is should be; a bit sticky, almost like plaster -> at least according to Google!}
5: Place a towel or some cling-film over the bowl and leave it to prove for two hours or until doubled in size. {I used clingfilm, make sure it's loose as mine rose A LOT. To prove, I put mine in our airing cupboard (where the boiler is) as it is the warmest location in our house. On a hot day, you can just prove in a room, otherwise use a proving drawer or other warm space. I would imagine a conservatory or maybe even green house works well too. Also, mine proved for about 3hrs instead as I was out and busy.}
6: Then knock back the dough by knocking the air out of it and giving it a light knead. {Mine was less sticky now, only getting slightly stuck to me when I lightly kneaded it (still in the bowl).}
7: Cover the bowl again with Clingfilm and place in the fridge overnight to rest.
8: Next make the creme patissiere, put the milk, vanilla and butter in a saucepan and bring them to a boil. {I made this the day before baking, which meant it had solidified in the fridge. In order to turn this around, I reheated it in a saucepan the next day. However, this did mean it was warm going onto the dough, not cooled. Next time, I would make on the day and leave to cool at room temperature, stirring every half hour or so.}
9: In another bowl mix the egg yolks, sugar, corn flour and plain flour together until pale in colour. {I used a fork for beating.}
10: Gently pour the hot milk into the egg mixture and stir the whole time to combine and make sure the eggs don't cook. Return the mixture to the saucepan and stir or whisk until the creme patissiere is thickened. {Don't stop stirring, honestly. This creme pastissiere is like magic, it thickens in an instant. One minute a thin milky liquid, the next POOF a super duper thick custard. Just like that; wham! So don't stop stirring, you will definitely know when this is thickened.} Taste a tiny amount to make sure all of the flour has been cooked off.
11: Place in a bowl and cover with cling-film, pressing it on to the surface of the creme patissiere and place it in the fridge to cool.
12: Take the brioche from the fridge and roll it out on a lightly floured surface until it measures roughly 45 cm x 30 cm and is about 1-1.5cm thick. {Only rough measurements.}
13: Whisk the creme patissiere to loosen it and then spread it evenly over the brioche, leave a couple of cm gap along one long edge so that the creme patissiere doesn't spill out when you roll it up.
14: Sprinkle the chocolate chips evenly over the dough and then roll the dough up to form a large swiss roll, {roll horizontally, with the long edge} trim the ends. You can still use these, but not as part of the finished bread. You should be able to cut the dough into 9 strips after it has been trimmed. {After trimming the ends, I was left with a 37cm log, I cut it into just over 4cm pieces.}
15: Grease the 23cm tin and place one brioche in the middle and arrange the other 8 around the edge, you may need to squeeze them in a little.
16: Cover the brioche lightly with cling-film and allow it to prove until doubled in size, probably about 3 hours {mine was slightly over} as the dough will be cold from the fridge.
17: Then preheat the oven to 180℃/160℃ fan/350℉/Gas Mark 4 and glaze with beaten egg yolk mixed with a few drops of warm water, bake for 35 mins, or until golden and crunchy to the touch. {Mine took 30mins. Keep in an airtight container.}
While you're here, I have a Pinterest for all my recipes where you can save them to boards for the future and categorise them into different types of recipe e.g Sunday Dinners, picnic ideas etc. My account is @hazellikestocook, or find the link below. Also, I have a whole blog post explaining this in more detail here and https://hazelscookingandbakingblog.blogspot.com/2021/02/pinterest.html. https://pin.it/5xDvARk - my profile
This recipe : https://pin.it/6cMcP6D


Comments
Post a Comment