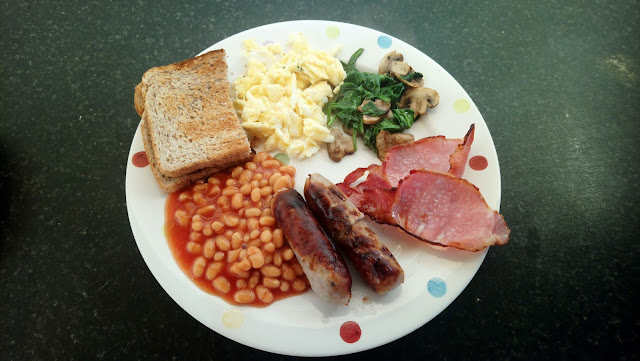
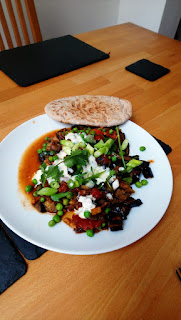
This recipe is on page 78 of Lorraine Pascale's 'Baking Made Easy' and the pastry recipe is on page 220, with extra blind baking help on page 113. In my house, the girls (me, my mum and sister) love a good Quiche Lorraine, my Dad, not so much a quiche lover, he isn't a fan of the texture. Usually, our go to is Quiche, baked beans and waffles/a pitta bread, it's so much better than it sounds honestly. But, today I switched it up and served mine with couscous and salad - it was really nice! I left the couscous plain (100g dry couscous to 125ml chicken stock - for 4 people) but you could definitely add some nuts or dried fruits and olive oils into it to bump up the flavour. I only left it plain for my sister. The Quiche end result was amazing!! The pastry was melt in your mouth and ridiculously moreish the texture of the egg and bacon mixture was just like shop-brought and the sweetness of the onions really brought everything together nicely, I would say it was a success. This recipe can be taken as a base recipe for lots of other quiches too: tomato and parmesan, beans/pulses, different meats, cheeses can be added and so can practically every vegetable under the sun, some good ones are: broccoli, leek, peppers and sweetcorn. Also, if you fancy, I have another quiche recipe of my blog: Blue Cheese and Broccoli Quiche and a Tuna Yogurt Quiche, if you are on a Quiche roll. They are perfect for outdoor picnics and lunches, which is especially useful due to the current COVID restrictions. Enjoy!
Serves: 6-8 {We did 6, with a side of couscous,(picture at bottom of post) crusty bread would work nicely too!}
Dietary Info:
-Contains Dairy {In the Quiche Lorraine, you could use a vegan/lactose free crème fraîche, such at oatly fraîche, but this is usually more expensive than a non-vegan version. In the pastry, the butter can be substituted for a dairy-free alternative, these are found in most major supermarkets, such as Flora. }
-No Nuts
-Contains Gluten {In the pastry, you can swap the plain flour for a G-F alternative, you will need more water though and maybe extra butter as well because, in order to rehydrate the flour, you will need more liquids than in general plain flour}
-Unsuitable for Vegetarians {In place of the streaky bacon, you can use chopped up veggie sausages, burgers, falafels or some pulses e.g chickpeas, lentils, kidney beans, black beans etc.. or use a Quorn ham}
-Unsuitable for Vegans {See above for Dairy and meat alternatives For the eggs in a quiche, which play a large role in the quiche, I imagine that it would be very hard to achieve the same effect. However, if you used a replacement such as CRACKD, VeganEgg or JUST, (I am thinking JUST would work the best but honestly I don't really know). Then, you may be able to yield a similar end result, or if you scrambled any of these products with some of the veggie meat suggestions and served it with a vegan pastry case you would also get a similar product}
-Main Meal
Quiche Lorraine:
Ingredients:
-1 quantity of savoury shortcrust pastry (see below) or 500g (1lb 2oz) shop-brought shortcrust pastry
-1-2tbsp olive oil
-1 medium onion, peeled and finely diced
-5 rashers of streaky bacon, diced
-430g (15oz) crème fraîche {I used Tesco's 50% less fat crème fraîche and it worked fine}
-4 eggs, lightly beaten
-Freshly ground black pepper
equipment:
23cm (9inch) fluted flan dish, about 3.5cm (1+3/4inch) deep {My dish wasn't fluted, nor was it a flan dish, I used a spring lock cake tin which are deeper but the same in width, which is why I ended up with quite a large crust}
Method:
1: Preheat the oven to 190℃/170℃ Fan/375℉/ Gas 5.
2: If using homemade pastry, make it according to the recipe below. Line the flan dish with the pastry (see below for more detail) and 'blind-bake' (see below for more detail) for 20mins. Remove the baking beans and paper from the pastry case, then return to the oven and bake for a further 10mins. Remove from the oven and set aside. Turn the oven down to 150℃/130℃ fan/300℉/ Gas 2.
3: The filling can be prepared while the pastry is baking. Heat the oil in a frying pan over a low heat, add the onion {And some salt} and fry until soft and translucent with no colour. This can take a good 15mins. {mine took about 10mins, and I didn't bother with the extra oil or water} If the onion looks like it's drying out add a splash more oil or water.
4: Remove the onion from the pan and set aside. Add the bacon to the pan and turn up the heat slightly and cook for 5-6mins. {The bacon should change colour to a lighter pink and the skin more wrinkly, if you prefer you bacon more ham-like you should cook for 5-6mins, if you prefer a more crispy bacon, leave it a bit longer. However, timings will vary from person to person depending on hob and heat} Remove from the heat and add half the bacon to the base of the flan dish. Place the flan dish on a flat baking tray.
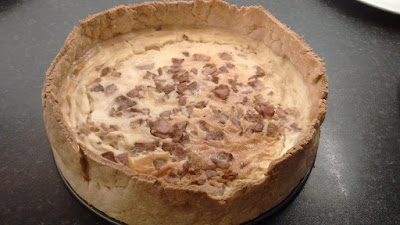
5: Whisk the crème fraîche and eggs together gently in a large bowl, then season with pepper. Stir in the onions. You will not need any salt as the bacon is already salty. {I did add some salt to the onions when they were frying, as it gives them a nicer flavour in my opinion} Pour the mixture into the flan dish all the way to the top. Sprinkle the remaining bacon on top of the quiche and bake in the oven for 35-40mins, or until the filling no longer wobbles.
6: Good to eat hot, but best eaten cold, giving the mixture a chance to settle. Kept in the fridge it tastes even better the next day. Perfect with salad, cold meats and a very chilled white wine. {I kept mine in the fridge overnight and served the next day, warm with couscous and salad}
Savoury Shortcrust Pastry:
Also, I was once told that in order to make a shortcrust pastry you will always need 1 part butter to 2 parts flour (1:2) So, even if you don't have a scale you can do 2tbsp of flour and 1tbsp butter, and keep increasing until you have enough pastry. Personally, I really enjoyed this pastry, it was crumbly in the mouth but solid enough to keep its shape well when cut. 10/10. I will definitely start adding egg yolks to my pastry if this is the result!
Ingredients:
-250g (9oz) plain flour {I had to use 40g of self-raising flour + extra for dusting and rolling because our plain flour ran out. Fortunately, the end result was no affected}
-125g (4+1/2oz) cold butter, cubed {I used salted butter}
-2 egg yolks
-Large pinch of salt
-1-4tbsp water, if needed
Method:
1: Put the flour and butter in a food processor and blitz to breadcrumbs. If using your hands, rub the flour and butter together until the mixture resembles fine breadcrumbs. {I used my hands, this will take a bit of time though so you will need to persevere. If you find yourself getting a bit bored, I find listening to a podcast or some music while I bake/cook fun} Add the egg yolks and a pinch of salt and stir together with a knife. Squidge the mixture together into a ball. If the pastry feels very dry add the water, but try and get by without for a more tender pastry. {I added 2+1/2 tbsp water}
2: Once the pastry is all squidged together, pop it into the fridge to rest for 30mins.
3: After 30mins, remove it from the fridge and let it warm up a little {Mine warmed for about 45mins} (If you use it straight from the fridge and try to roll it out, the pastry will just be a hopeless crumbly mess). Roll the pastry out on a lightly floured board {I used a worksurface, it was fine} and use as required.
How to line and blind bake pastry:
This was super easy and honestly not as complex as it looks. Don't worry if you don't own any baking beans as dried pulses and pasta work fine as well. However, if you plan to be blind baking more frequently you will want to change the pulses/pasta you are using as eventually the heat will break them down too much for use. Finally, I lightly greases my tin before placing the pastry in, this is optional and the original recipe doesn't mention it, but I have had too many bakes stick to the bottom and sides of tins and trays, meaning it doesn't look as pretty when plated up.
1: Roll out the pastry on a lightly floured work surface to just under the thickness of a £1 coin. If using a flan ring, put it on a baking tray. {I put my cake tin on a baking tray, just for ease of removing into and out of the oven} Lower the pastry into the ring or tin {I lightly greased my tin} and ease down into the sides and corners. {Don't force it into place as you risk tearing the pastry, fortunately, this can easily be patched up though by pressing gently with your fingers on the tear}Place in the fridge for about 30mins, or until firm.
2: Preheat the oven to 190℃/170℃ Fan/375℉/ Gas 5.
3: Once the pastry is firm, remove it from the fridge, take a piece of baking paper, slightly larger than the tart and scrunch it up, then unscrunch it and line the tart with it, taking it right up the sides. Fill with baking beans or dried beans {I used baking beans} and 'blind bake' in the oven for 15-20mins, {I found that I needed 20mins} until the edges are light brown and the base is dry to the touch. Remove the baking beans and paper and cook for a further 3-4mins, {I did closer to 5mins} until golden. Remove from the oven and set aside.
While you're here, I have a Pinterest for all my recipes where you can save them to boards for the future and categorise them into different types of recipe e.g Sunday Dinners, picnic ideas etc. My account is @hazellikestocook, or find the link below. Also, I have a whole blog post explaining this in more detail here and https://hazelscookingandbakingblog.blogspot.com/2021/02/pinterest.html.
https://pin.it/5xDvARk - my profile


Comments
Post a Comment